Building High-Availability Kubernetes Cluster with Ansible
Table of Content
Building High-Availability Kubernetes Cluster with Ansible
Introduction
I have been doing homelab scrap & build every once in a while, trying out something new every time. The most recent biggest change was that I got a machine powerful enough to run as a hypervisor, and so I decided to do my homelab build with following new challenges:
- Servers
- More virtual machines with various Linux distros
- Build and run process
- More automated setup tasks using ansible
- Kubernetes cluster design
- External etcd topology
- Highly available control plane using haproxy and keepalived
- Use cilium instead of Calico for the kubernetes cluster network add-on
- Replaces MetalLB to provide loadbalancer and L2 advertisement features
- Replaces NGINX fabric gateway to provide gateway api implementation
- Use longhorn instead of MinIO DirectPV for the volume provisioning feature
- Test out percona everest to see if this can replace Bytebase
What's covered in this post
Following topics are covered in this post:
- Onboard new servers as ansible-managed nodes
- Gathering facts from the servers (just for fun)
- Introducing simple tasks such as package upgrade and reboot
- Running DNS servers using Docker
- Setting up kubernetes-ready nodes
- Setting up etcd cluster
- Setting up kubernetes cluster
- Cilium l2announcement demo to access Cilium Hubble UI
The project content is available here: https://github.com/pkkudo/homelab-v3
What's NOT covered
I will skip the server preparation work. I will be starting at the point where the servers are already up and running, waiting to be setup.
They are all VM running on either Proxmox or Hyper-V, installed using installer images or built off of cloud-init images, and are running ssh-headless.
Explaining the design
Let me introduce the very first kubernetes cluster I built, and the HA cluster I am going to build this time.
Basic Kubernetes Cluster
The very first kubernetes cluster was composed of three nodes: one control plane and two worker nodes. You prepare three machines and configure and install requirements, and initialize the cluster on control plane node, and then have other worker nodes join the cluster.
This single control plane node is the only contact point for operators and kubernetes components themselves to communicate with the kubernetes cluster.
The etcd service, which is the memory store of the cluster information, is also running on the control plane node as the essential service to maintain the cluster.
---
title: basic kubernetes cluster
---
flowchart TD
    subgraph kubernetes[Kubernetes Cluster]
      subgraph worker[Worker Nodes]
        worker1
        worker2
      end
      subgraph control_plane[Control Plane Node]
        cp1[cp1<br/>control plane including etcd]
      end
    end
Kubernetes Cluster to be Built This Time
This time round, since I have more capability to boot up servers as virtual machines, I am going to have an etcd cluster composed of three nodes and a kubernetes cluster composed of three control plane nodes and one worker node.
Etcd, the memory store for the kubernetes cluster, is now in form of a cluster living outside of the kubernetes cluster. Control planes now have redundant etcd endpoints available to use.
Control planes are also redundant.
Each of the three control plane nodes runs keepalived to host a highly-available virtual IP address (VIP), and haproxy to listen to the requests for kube-apiservers using the VIP and loadbalance it and pass them on to any of the control plane node.
---
title: kubernetes cluster with external etcd cluster
---
flowchart TD
    subgraph kubernetes[Kubernetes Cluster]
      subgraph control_plane[Control Plane Node]
        cp1
        cp2
        cp3
      end
      subgraph worker[Worker Nodes]
        worker1
      end
    end
    subgraph etcd[External etcd cluster]
      etcd1
      etcd2
      etcd3
    end

    cp1 --- etcd1
    cp1 --- etcd2
    cp1 --- etcd3
    cp2 --- etcd1
    cp2 --- etcd2
    cp2 --- etcd3
    cp3 --- etcd1
    cp3 --- etcd2
    cp3 --- etcd3
Keepalived for VIP
Here is a simple diagram on keepalived. They speak among each other and have one node host the VIP, 192.0.2.8 in this case. Whoever with the highest priority takes over the VIP among the members.
---
title: keepalived on each control plane node
---
flowchart TD
    subgraph control_plane[control plane nodes]
      subgraph lab-cp1[lab-cp1 192.0.2.1]
        keepalived1[keepalived vip 192.0.2.8]
      end
      subgraph lab-cp2[lab-cp2 192.0.2.2]
        keepalived2[keepalived vip 192.0.2.8]
      end
      subgraph lab-cp3[lab-cp3 192.0.2.3]
        keepalived3[keepalived vip 192.0.2.8]
      end
    end
Haproxy for loadbalancing
Here is a diagram on haproxy. Haproxy server on each node will be configured to listen on port 8443 and pass on the traffic to any available kube-apiserver.
Kube-apiserver is the main communication point on control plane and its default port is 6443. I will configure the cluster endpoint to VIP:8443 or 192.0.2.8:8443 so that the communications to the kubernetes cluster reaches any control plane node who owns the VIP at the moment, and haproxy service receives the traffic, loadbalance and passes on the traffic to any one of the available kube-apiservers.
---
title: haproxy on each control plane node
---
flowchart TD
    subgraph control_plane[control plane nodes]
      vip[VIP 192.0.2.8]
      vip --- haproxy1
      vip --- haproxy2
      vip --- haproxy3
      subgraph lab-cp1[lab-cp1 192.0.2.1]
        haproxy1[haproxy:8443] --- kubeapi1[kube-apiserver:6443]
      end
      subgraph lab-cp2[lab-cp2 192.0.2.2]
        haproxy2[haproxy:8443] --- kubeapi2[kube-apiserver:6443]
      end
      subgraph lab-cp3[lab-cp3 192.0.2.3]
        haproxy3[haproxy:8443] --- kubeapi3[kube-apiserver:6443]
      end
    end

    haproxy1 --- kubeapi2
    haproxy1 --- kubeapi3
    haproxy2 --- kubeapi1
    haproxy2 --- kubeapi3
    haproxy3 --- kubeapi1
    haproxy3 --- kubeapi2
Server List and IP Addressing
This is the list of all servers.
For documentation purpose, I am using 192.0.2.0/24 subnet throughout this post, but on my actual environment they are running with the ordinary private IP addressing.
The same goes for the domain. They will have lab.example.net domain in this write up.
| hostname | ipaddr | role | os | cpu | memory | disk | hypervisor |
|---|---|---|---|---|---|---|---|
| lab-cp1 | 192.0.2.1 | kubernetes control plane | debian | 4 | 4GB | 64GB | hyper-v |
| lab-cp2 | 192.0.2.2 | kubernetes control plane | rocky | 4 | 4GB | 64GB | proxmox |
| lab-cp3 | 192.0.2.3 | kubernetes control plane | ubuntu | 4 | 4GB | 64GB | proxmox |
| lab-worker1 | 192.0.2.4 | kubernetes worker node | rhel | 4 | 4GB | 64GB | hyper-v |
| lab-etcd1 | 192.0.2.5 | etcd node | debian | 2 | 4GB | 64GB | hyper-v |
| lab-etcd2 | 192.0.2.6 | etcd node | debian | 2 | 4GB | 64GB | proxmox |
| lab-etcd3 | 192.0.2.7 | etcd node | oracle | 2 | 4GB | 64GB | proxmox |
| lab-ns1 | 192.0.2.16 | run dns server using docker | rhel | 1 | 1GB | 32GB | proxmox |
| lab-ns2 | 192.0.2.17 | run dns server using docker | debian | 1 | 2GB | 10GB | hyper-v |
And here are a few more IP addresses to mention:
- 192.0.2.8 as VIP, the kube-endpoint destination IP address
- the kube-endpoint will be lab-kube-endpoint.lab.example.net:8443
- resolves to 192.0.2.8 by DNS
- processed by haproxy to pass on the traffic to the actual endpoint, kube-apiserver listening on 6443
- the kube-endpoint will be lab-kube-endpoint.lab.example.net:8443
- 192.0.2.9 for Cilium L2 advertisement used to access Cilium Hubble UI which will be used in the very end of this post
Project Preparation
Let us start with the project preparations. Here is the list of steps:
- git clone the repository
- prepare python environment and install ansible
- install additional ansible collections
- explain about the ansible configuration file
- explain about ansible inventory, variables, and encrypted variables using ansible-vault
- prepare name resolution for ansible master either by hosts file or DNS
- update hosts-list.txt file in the inventory directory if using hosts file
- prepare ssh key pair to use
- review ansible inventory variable files and update ansible username as necessary
- create variables file for kubernetes group and specify VIP address for kube-endpoint
- update nameservers list in the defaults file on dns role
- update DNS records configuration template file on dns role
- other notable variables
Clone the Repository
Here is my public repository.
TODO: add github repo url once ready
git clone -b zenn-post https://github.com/pkkudo/homelab-v3
cd homelab-v3

# optionally, set your own origin
git remote remove origin
git remote add origin {your_repo}
Installing Ansible
I did the whole re-run of the steps described in this post using cloud-init debian 12 image. It did have python3 installed but not venv so that's where I start. Also the python3 version was 3.11 while the project asks for 3.12, so I installed mise to prepare python 3.12.
# install mise
curl https://mise.run | sh
echo "eval \"\$(/home/YOUR_USERNAME_HERE/.local/bin/mise activate bash)\"" >> ~/.bashrc

# re-logon and come back to the cloned homelab-v3 directory
# and have mise trust .mise.toml file in this project directory
mise trust
# install python version as described in .mise.toml file
mise up

# create venv at .venv and load the environment
python -m venv ~/homelab-v3/.venv
source .venv/bin/activate

# enable mise experimental feature to have mise automatically activate python
mise settings experimental=true

# get latest pip, install poetry, and install ansible using poetry
pip install -U pip
pip install poetry

# install ansible as defined in pyproject.toml file
poetry install --no-root

# install ansible collections
ansible-galaxy collection install -r requirements.yml
Mise and poetry help install the same packages and versions I use, but simply getting the latest ansible installed on whichever python version you use should be fine as well.
sudo apt install python3 python3-venv
python3 -m venv .venv
source .venv/bin/activate
pip install -U pip ansible
ansible-galaxy collection install -r requirements.yml
If sshpass is not installed
If you get an error message like this, you can install sshpass to resolve this error (sudo apt install sshpass for example).
lab-etcd1 | FAILED! => {
    "msg": "to use the 'ssh' connection type with passwords or pkcs11_provider, you must install the sshpass program"
}
Ansible Configuration File
Let me explain what is configured in the provided ansible configuration file at ./ansible.cfg.
Under [general] section...
- inventory is to specify the default ansible inventory file to use.
- vault_password_file is to specify the ansible vault password file used to decrypt ansible-vault encrypted data in this ansible project.
- roles_path is to set the path for ansible roles.
- collections_path is to set the ansible collections path.
And under [ssh_connection] section...
- ssh_args is to set the arguments to set when running ssh to connect to remote hosts. I have set what's convenient for me to work on my tiny homelab. Do note that this is not secure at all.
See the official documentation on generating sample configuration file for your reference.
Ansible Inventory, Variables, and Encrypted Variables using Ansible Vault
Let me explain briefly about ansible inventory, variable, and vault.
The ansible inventory file has the list of hosts to work with. You can put multiple hosts in a group. You can specify the target by host or group name.
# list "all" hosts defined in the inventory file at ./inventory/hosts.yml
ansible -i inventory/hosts.yml all --list-hosts

# since the default inventory file is set in the ansible config file, you can omit -i option to specify which inventory file to use
ansible all --list-hosts

# confirm hosts in different groups
ansible lab --list-hosts
ansible lab_kubernetes --list-hosts
ansible lab_k8s_cp --list-hosts
ansible lab_k8s_worker --list-hosts
ansible lab_etcd --list-hosts
You can set variables for a group in a file. Let's go see the files in ./inventory/group_vars/lab for example. They contain variables applied to all the hosts that's in lab group, which is virtually all the hosts in this project.
Say, domain_suffix is set to lab.example.net, and ansible_host is set to "inventory name".domain_suffix. So in case of lab-cp1 host, its ansible_host value is going to be lab-cp1.lab.example.net.
# ansible remote access
ansible_user: "{{ vault_ansible_user }}"
ansible_username: "{{ vault_ansible_user }}" # required by bootstrap playbook
ansible_ssh_private_key_file: "{{ playbook_dir }}/files/ssh/id_ed25519_ansible"
ansible_ssh_pubkey: "{{ playbook_dir }}/files/ssh/id_ed25519_ansible.pub"
domain_suffix: "lab.example.net"
ansible_host: "{{ inventory_hostname_short }}.{{ domain_suffix }}"
And this variable ansible_user is pointing to another variable, vault_ansible_user, and so as ansible_username. This is one way of encrypting sensitive data in an ansible project. In the ./inventory/group_vars/lab/vars.yml file I am making it obvious that these variables are defined, and also trying to make it fairly obvious that its actual value is encrypted and present in the vault file, ./inventory/groups_vars/lab/vault.yml.
If you try to see the content of the vault file directly, all you can see is the meaningless strings. You can view the encrypted vault data by using ansible-vault command and the right vault password.
In this project I placed the vault password file as ./.vault_pass and configured to use it in the ansible configuration file, ./ansible.cfg, so you should be able to see the same result if you cat and ansible-vault view on this same file, the encrypted and decrypted outputs.
The vault is not used in this repository except for here. It's just there to show off this important feature everyone should be using regardless of the project visibility.
$ cat inventory/group_vars/lab/vault.yml
$ANSIBLE_VAULT;1.1;AES256
30656633313135653464373834663137646662633137376564653864653565333661333339616661
6133336638316131643831333033353334366435613062610a373234333434313734333333346164
35353339343862666466653233353961663661363762353939616662356237626163323634363630
3132653733616464390a316332316332663331656236386331656630623364343061393835393038
63623466383437633162353533373036623038346433616361363839643433343563636466363363
34313264623833626363363834393837366465666534623465626237383532623939356664353261
373531613066666539643962393862323761

$ ansible-vault view inventory/group_vars/lab/vault.yml
# ansible remote access
vault_ansible_user: "ansible-hlv3"
Name Resolution for Ansible Master and Homelab Hosts
Ansible master must access ansible-managed-host using ssh in order to execute ansible tasks. All that's said in the inventory file is mere hostname such as lab-cp1 and lab-worker1, but the actual target used is ansible_host which was tweaked through the "lab" group variable file to make it lab-cp1.lab.example.net for lab-cp1, and lab-worker1.lab.example.net for lab-worker1 host.
If you do not want to worry about name resolution, you could delete ansible_host line from the group variables file and have inventory file like this:
lab:
  children:
    lab_kubernetes:
      children:
        lab_k8s_cp:
          hosts:
            192.0.2.1:  # instead of lab-cp1
        lab_k8s_worker:
          hosts:
            192.0.2.4:  # instead of lab-worker1
In this post, I will continue on and prepare temporary name resolution measure using hosts file, and later setup DNS servers.
cp inventory/hosts-list.txt.example inventory/hosts-list.txt

# edit inventory/hosts-list.txt
# and set the actual IP addresses for the hosts

# append the hosts-list.txt lines to the /etc/hosts file
sudo tee -a /etc/hosts < inventory/hosts-list.txt

# test
ping lab-cp2
ping lab-cp3.lab.example.net
Here of course you can modify the domain name, and also remember to update the domain_suffix value accordingly in the lab group values file.
Let's go ahead and also prepare the DNS configuration file which will be used in ansible task to prepare DNS server. The format should be self-explanatory, and all you have to change is the IP address in each line.
You notice there are two lines that are not for the hosts. One is lab-kube-endpoint.lab.example.net which is the VIP for kube-apiserver on control plane nodes. Another is hubble-ui.lab.example.net which will be used in the very last when demonstrating L2 announcement feature.
cp roles/dns/templates/a-records.j2.example roles/dns/templates/a-records.j2

# edit this a-records.j2 file
# to match the actual environment
#
# for example, if your homelab subnet is 10.8.0.0/24,
# some of your records might look as follows:
# local-data: "lab-cp1.{{ domain_suffix }}. IN A 10.8.0.20"
# local-data: "lab-cp2.{{ domain_suffix }}. IN A 10.8.0.21"
SSH Key Pair for Ansible User
Next up, you need to prepare ssh key pair for the ansible user, "ansible-hlv3" or whatever username you decide to use.
Here is what you can do if you are changing the username: delete ./.vault_pass file and ./inventory/group_vars/lab/vault.yml file, create your own vault password file, and then finally the new vault file by running ansible-vault create inventory/group_vars/lab/vault.yml.
For your reference, here is a quick script to generate a random password string that can be used for ansible vault.
# generating random 31 characters alpha-numerical string used as ansible vault password
tr -dc '[:alnum:]' < /dev/urandom | head -c 31 > .vault_pass
Now back on ssh matter, you can use ssh-keygen to generate a new ssh key pair. The ssh related variables set in the lab group variable file point to the files in this directory ./playbooks/files/ssh.
# prepare playbooks dir
# and files/ssh directory to place ssh key pair used by ansible master
mkdir -p playbooks/files/ssh
cd playbooks/files/ssh
ssh-keygen -t ed25519 -f id_ed25519_ansible
Combining ansible_host and ansible_ssh_private_key_file together, the ansible master will basically do ssh [email protected] -i playbooks/files/ssh/id_ed25519_ansible to work on the remote host lab-cp1.
Variables to Set
We need to set a few more variables before start running ansible playbooks to setup our homelab hosts.
Nameservers
The DNS servers will be setup on lab-ns1 and lab-ns2 hosts. Update nameservers variable in ./roles/dns/defaults/main.yml by specifying the two actual IP addresses for lab-ns1 and lab-ns2, and they will be used in a playbook to update nameservers settings for all hosts.
You could instead add the nameservers variable in the lab group variable file at ./inventory/group_vars/lab/vars.yml to specify the nameservers for the lab environment, and maybe a different set of nameservers for a different environment such as ./inventory/group_vars/dev/vars.yml if you have "dev" group created in your inventory.
VIP for kube-endpoint
The VIP for the kube-endpoint must be set as kube_endpoint_vip in ./roles/kubernetes/defaults/main.yml file. It should be the same IP address mentioned earlier when preparing DNS configuration file in ./roles/dns/templates/a-records.j2. The value is set to 192.0.2.8 to align with the document, but this is not what you want to be using on your homelab.
Again, you could configure this in a group variable file such as "lab" group or "lab_kubernetes" group, or wherever it feels appropriate in managing your ansible project.
Other Variables in the Project
There are many other variables set in different places in this ansible project. Rather than explaining every single details, let me just mention about the following key variables you might want to revisit later and edit:
- version of kubernetes, cni, runc, containerd, etcd found in
./roles/kubernetes/defaults/main.yml- 1.32.2 for kubernetes
- 2.0.2 for containerd
- 1.2.5 for runc
- 1.6.2 for cni
- 3.5.18 for etcd
- image and image tag for keepalived and haproxy found in
./roles/kubernetes/defaults/main.yml- osixia/keepalived:stable for keepalived last updated in 2020
- on my homelab I am actually using my own built image 2.3.2 released on Nov 2024 available in my private image registry
- I might post a separate article on how to create it
- haproxy:3.1.5-alpine for haproxy
- osixia/keepalived:stable for keepalived last updated in 2020
- unbound DNS image and tag in
./roles/dns/templates/env.j2- mvance/unbound:1.21.1
- docker version in
./roles/docker/defaults/main.yml- 27.5.1
- ansible collections and their versions in
./requirements.yml
First Playbook - bootstrap
Now that all the preparatory work is done, we can run our first playbook to sort out the access credentials.
This is the playbook that takes care of following changes:
- create
ansible-admingroup - create
ansible_useras member ofansible-admingroup - install sudo and enable password-less sudo for users in
ansible-admingroup - set authorized ssh public key for the
ansible_user
As for my VMs created using cloud-init image, I created user with the ansible_user username and set the same ssh public key as the authorized key, so half of the tasks are already done. I am going to run the playbook targeting these VMs first.
And then I will run another play against the other VMs where I must specify the different username and password.
# bootstrap on cloud-init VMs
ansible-playbook playbooks/bootstrap.yml --limit lab-cp2:lab-cp3:lab-etcd2:lab-etcd3:lab-ns1

# bootstrap on the other VMs
# specifying username and password
# if your existing username to use is happyansibleuser, "-e ansible_user=happyansibleuser"
# if ssh key logon is not setup for that user, you can omit "-e ansible_ssh_private_key_file=..."
# if no remote host is going to ask for logon password, you can omit "-k" option
# the capital "-K" option is always needed to enter privilege password to execute tasks that require sudo or su
ansible-playbook playbooks/bootstrap.yml --limit lab-cp1:lab-etcd1:lab-worker1:lab-ns2 -e ansible_user=$USER -e ansible_ssh_private_key_file=~/.ssh/id_ed25519 -k -K
# ansible will ask you for "-k" password and "-K" password
Once the remote hosts are all bootstrapped, you should be able to ssh logon as ansible_user using the ssh key.
$ ssh ansible-hlv3@lab-etcd3 -i playbooks/files/ssh/id_ed25519_ansible cat /etc/hostname /etc/os-release
lab-etcd3
NAME="Oracle Linux Server"
VERSION="9.5"
ID="ol"
ID_LIKE="fedora"
VARIANT="Server"
VARIANT_ID="server"
VERSION_ID="9.5"
PLATFORM_ID="platform:el9"
PRETTY_NAME="Oracle Linux Server 9.5"
ANSI_COLOR="0;31"
CPE_NAME="cpe:/o:oracle:linux:9:5:server"
HOME_URL="https://linux.oracle.com/"
BUG_REPORT_URL="https://github.com/oracle/oracle-linux"

ORACLE_BUGZILLA_PRODUCT="Oracle Linux 9"
ORACLE_BUGZILLA_PRODUCT_VERSION=9.5
ORACLE_SUPPORT_PRODUCT="Oracle Linux"
ORACLE_SUPPORT_PRODUCT_VERSION=9.5

$ ssh ansible-hlv3@lab-cp2 -i playbooks/files/ssh/id_ed25519_ansible id && cat /etc/hostname /etc/os-release
uid=1000(ansible-hlv3) gid=1000(ansible-hlv3) groups=1000(ansible-hlv3),1001(admin-ansible) context=unconfined_u:unconfined_r:unconfined_t:s0-s0:c0.c1023
crocus
PRETTY_NAME="Debian GNU/Linux 12 (bookworm)"
NAME="Debian GNU/Linux"
VERSION_ID="12"
VERSION="12 (bookworm)"
VERSION_CODENAME=bookworm
ID=debian
HOME_URL="https://www.debian.org/"
SUPPORT_URL="https://www.debian.org/support"
BUG_REPORT_URL="https://bugs.debian.org/"
You can also run a quick ping-pong against ansible-managed-hosts using ansible.
Gathering Facts
Let's run information gathering task and see how much information ansible is processing in the background.
You can see that ansible is detecting the facts about remote hosts such as package manager (apt, dnf, etc.), service manager (systemd), OS family, distribution name and version, NIC details, and many other information.
# run the playbook
ansible-playbook playbooks/gather_facts.yml

# facts gathered are stored locally in ./playbooks/facts/
ls -1 playbooks/facts
less playbooks/facts/lab-worker1.json
Simple Package Upgrade Task and Reboot Task
There is a playbook you can use to execute simple package upgrade tasks included in the repository.
And also a simple server reboot playbook. It's there for you if you want to just go reboot all.
Setting Up Docker-Ready Hosts
Let's run playbook to install docker on lab-ns1 and lab-ns2 meant to play DNS servers role.
Now, contrarily to the previous playbook, this playbooks/docker.yml playbook is hard-coded to target hosts in docker and lab_docker groups in the inventory.
# run the playbook
ansible-playbook playbooks/docker.yml --tags cleaninstall

# test docker by running hello-world
ansible-playbook playbooks/docker.yml --tags test

# see running docker container list
ansible-playbook playbooks/docker.yml --tags status
The last tag "status" should show nothing as no container should be running then. You can run this again in the next section after spinning up the DNS servers.
Running DNS Server Using Docker
Let's run the next playbook to spin up DNS servers using docker.
We have prepared the DNS configuration file ./roles/dns/templates/a-records.j2. The DNS server will help resolve these names in the configuration file, and for everything else it's going to use Cloudflare DNS servers.
Basically the tasks executed are:
- stop if the DNS server is already up
- upload the latest configuration from the ansible master
- start the DNS service (
docker compose up -d) - verify the name resolution by using either or both
hostanddigcommand
Name Lookup Tests
The verification task could be improved with more flexibility, but the current version I have included in the repo only works for the "lab" group.
- check if
hostcommand is present on ansible master - check if
digcommand is present on ansible master - run name lookup test using
hostand thendig(skipped if the command is not present)- to lookup cloudflare.com. SOA record (out in the Internet)
- to lookup any random one host from the "lab" group in the ansible inventory, "HOSTNAME.DOMAIN_SUFFIX" like "lab-cp1.lab.example.net."
- to lookup "happyansibleuser.DOMAIN_SUFFIX", "happyansibleuser.lab.example.net." which should result in NXDOMAIN
You can run ansible-playbook playbooks/dns.yml --tags start --limit lab-ns2 -v to see the actual response for the lookup tests. One time you might see the second name lookup task is doing the lookup for lab-cp1.lab.example.net, and on another run that may be lab-etcd2.lab.example.net lookup.
Which server to send the name lookup query to is specified in the test commands, so it does not matter if the ansible master has /etc/hosts file or different nameservers configured or not.
DNS Server Configuration
You can logon to either of the hosts and run docker exec to see the files on the running DNS container.
# list of configuration files
docker exec dns ls -1 /opt/unbound/etc/unbound

# forwarder config
# where you can find the forwarder settings to use TLS for root ".",
# and that the upstream servers are 1.1.1.1 and 1.0.0.1
docker exec dns cat /opt/unbound/etc/unbound/forward-records.conf
Running Container List
If you run ansible-playbook playbooks/docker.yml --tags status, you will see the output like this.
TASK [Container status] ********************************************************************************************************************************************************************
included: docker for lab-ns1, lab-ns2

TASK [docker : Gather information on running containers] ***********************************************************************************************************************************
ok: [lab-ns2]
ok: [lab-ns1]

TASK [docker : Show information on running containers if any] ******************************************************************************************************************************
ok: [lab-ns1] => (item={'Id': '83836f4f4abace42234143e547c4b8447d58013fdb9b39bf1dcc49cdf57dbc5c', 'Image': 'mvance/unbound:1.21.1', 'Command': '/unbound.sh', 'Created': 1741051361, 'Status': 'Up 27 minutes (healthy)', 'Ports': [{'IP': '0.0.0.0', 'PrivatePort': 53, 'PublicPort': 53, 'Type': 'tcp'}, {'IP': '::', 'PrivatePort': 53, 'PublicPort': 53, 'Type': 'tcp'}, {'IP': '0.0.0.0', 'PrivatePort': 53, 'PublicPort': 53, 'Type': 'udp'}, {'IP': '::', 'PrivatePort': 53, 'PublicPort': 53, 'Type': 'udp'}], 'Names': ['/dns']}) => {
    "msg": [
        "Image: mvance/unbound:1.21.1",
        "Status: Up 27 minutes (healthy)"
    ]
}
ok: [lab-ns2] => (item={'Id': 'c9e524ea4ec1f55cab26722fd6c133fbb33c16ad206fa637e3b3a495692c3ae1', 'Image': 'mvance/unbound:1.21.1', 'Command': '/unbound.sh', 'Created': 1741052118, 'Status': 'Up 25 minutes (healthy)', 'Ports': [{'IP': '0.0.0.0', 'PrivatePort': 53, 'PublicPort': 53, 'Type': 'tcp'}, {'IP': '::', 'PrivatePort': 53, 'PublicPort': 53, 'Type': 'tcp'}, {'IP': '0.0.0.0', 'PrivatePort': 53, 'PublicPort': 53, 'Type': 'udp'}, {'IP': '::', 'PrivatePort': 53, 'PublicPort': 53, 'Type': 'udp'}], 'Names': ['/dns']}) => {
    "msg": [
        "Image: mvance/unbound:1.21.1",
        "Status: Up 25 minutes (healthy)"
    ]
}
Enable the DNS Server on systemd
You can optionally run the dns playbook with "enable" tag to create a systemd service unit file to enable it on systemd so that the DNS service starts automatically when the server was rebooted.
Change nameservers settings
Now that we have DNS servers running, we can next run the playbook to update nameservers settings on all the hosts. Remember the nameservers variable updated as part of the preparatory tasks in ./roles/dns/defaults/main.yml. That will be used to update the settings.
The playbook works with followings network services:
- networking, the usual /etc/resolv.conf file update
- NetworkManager (many RedHat distros and some Debian distros)
- if DNS configuration is not included, /etc/resolv.conf gets updated
- netplan (usually seen on Ubuntu)
Setting Up Kubernetes-Ready Hosts
Now let's run the playbook to configure the remaining hosts to be kubernetes-ready.
There will be many changes made and many packages installed. Let's first run a check task and see the report generated.
The report shows what versions of kube packages and containerd and other packages are installed, if swap memory is avaialble, and so on.
# check the host and generate report
ansible-playbook playbooks/kubernetes.yml --tags check

# see the report
cat playbooks/files/kubernetes/lab.md
cat playbooks/files/kubernetes/lab-etcd.md
Now, let's run tasks to actually make changes to prepare these hosts.
# prepare kubernetes-ready hosts
ansible-playbook playbooks/kubernetes.yml --tags prepare

# run another check and see what's in the report
ansible-playbook playbooks/kubernetes.yml --tags check
cat playbooks/files/kubernetes/lab.md
cat playbooks/files/kubernetes/lab-etcd.md
Now the hosts have everything installed and configured to take part in kubernetes cluster. If you are to setup a single control plane kubernetes cluster, you can go right ahead and run kubeadm init on a control plane node, and run kubeadm join to join other nodes as worker.
In this post, we have to go take a few more steps to prepare other components that make up a kubernetes cluster with redundant kube-adpiservers.
Setting up etcd cluster
We will next setup an etcd cluster. Here is the list of tasks in brief:
- install etcdctl (used later to run manual health check)
- configure kubelet to manage etcd service
- generate CA for the etcd cluster
- generate other TLS certificates and keys for etcd themselves and also kubernetes control planes to use
- prepare static pod manifest to run etcd cluster
- (and kubelet will automatically spin up the etcd container and they form a cluster)
# run the playbook to spin up an etcd cluster
ansible-playbook playbooks/etcd.yml --tags cluster

# run manual etcd cluster check tasks to verify
ansible-playbook playbooks/etcd.yml --tags healthcheck
Setting up kubernetes cluster
The next playbook will spin up the kubernetes cluster. Here is the list of tasks:
- prepare cluster configuration file
- prepare keepalived configuration file and heath check script file
- prepare haproxy configuration file
- prepare static pod manifest for keepalived and haproxy
- upload TLS certificates and keys required to communicate with the etcd cluster
- run
kubeadm initto spin up the cluster on one control plane node - copy TLS certificate and key files over to the other control plane nodes and join as control plane
- join worker nodes
# form a cluster on one control plane node
# and join other control plane nodes
ansible-playbook playbooks/kubernetes.yml --tags cluster

# join worker nodes to the cluster
ansible-playbook playbooks/kubernetes.yml --tags worker

# see the output of "kubectl get nodes" taken after the tasks above
cat playbooks/files/kubernetes/kubectl_get_nodes.txt
Kubernetes Cluster Status Post-Init
As part of post-init tasks, the /etc/kubernetes/admin.conf required to communicate with the cluster using tools such as kubectl is copied to ~/.kube/config on each control plane host.
You can run commands such as crictl ps and kubectl get pods to see the running containers.
# output example of crictl ps
$ ssh ansible-hlv3@lab-cp2 -i playbooks/files/ssh/id_ed25519_ansible sudo crictl ps
CONTAINER           IMAGE               CREATED             STATE               NAME                      ATTEMPT             POD ID              POD                               NAMESPACE
6308f99d17515       d04966a100a7a       31 minutes ago      Running             keepalived                0                   a7f6f6d6b1025       keepalived-lab-cp2                kube-system
9a22ab5f6fc82       cf865d0b2bcd1       31 minutes ago      Running             haproxy                   0                   e1079c84cf6d1       haproxy-lab-cp2                   kube-system
9bb4f91523f67       85b7a174738ba       31 minutes ago      Running             kube-apiserver            0                   b557f1c7c4ef5       kube-apiserver-lab-cp2            kube-system
541b4d84f26c8       b6a454c5a800d       31 minutes ago      Running             kube-controller-manager   0                   62c785292829b       kube-controller-manager-lab-cp2   kube-system
3dfb7d3646135       d8e673e7c9983       31 minutes ago      Running             kube-scheduler            0                   b204de296f5a8       kube-scheduler-lab-cp2            kube-system

# output example of kubectl get pods, node ipaddr edited
$ ssh ansible-hlv3@lab-cp1 -i playbooks/files/ssh/id_ed25519_ansible kubectl get pods -n kube-system -o wide
NAME                              READY   STATUS    RESTARTS   AGE   IP             NODE      NOMINATED NODE   READINESS GATES
coredns-668d6bf9bc-bbldg          0/1     Pending   0          31m   <none>         <none>    <none>           <none>
coredns-668d6bf9bc-qtcrw          0/1     Pending   0          31m   <none>         <none>    <none>           <none>
haproxy-lab-cp1                   1/1     Running   0          31m   192.0.2.1      lab-cp1   <none>           <none>
haproxy-lab-cp2                   1/1     Running   0          31m   192.0.2.2      lab-cp2   <none>           <none>
haproxy-lab-cp3                   1/1     Running   0          31m   192.0.2.3      lab-cp3   <none>           <none>
keepalived-lab-cp1                1/1     Running   0          31m   192.0.2.1      lab-cp1   <none>           <none>
keepalived-lab-cp2                1/1     Running   0          31m   192.0.2.2      lab-cp2   <none>           <none>
keepalived-lab-cp3                1/1     Running   0          31m   192.0.2.3      lab-cp3   <none>           <none>
kube-apiserver-lab-cp1            1/1     Running   0          31m   192.0.2.1      lab-cp1   <none>           <none>
kube-apiserver-lab-cp2            1/1     Running   0          31m   192.0.2.2      lab-cp2   <none>           <none>
kube-apiserver-lab-cp3            1/1     Running   0          31m   192.0.2.3      lab-cp3   <none>           <none>
kube-controller-manager-lab-cp1   1/1     Running   0          31m   192.0.2.1      lab-cp1   <none>           <none>
kube-controller-manager-lab-cp2   1/1     Running   0          31m   192.0.2.2      lab-cp2   <none>           <none>
kube-controller-manager-lab-cp3   1/1     Running   0          31m   192.0.2.3      lab-cp3   <none>           <none>
kube-scheduler-lab-cp1            1/1     Running   0          31m   192.0.2.1      lab-cp1   <none>           <none>
kube-scheduler-lab-cp2            1/1     Running   0          31m   192.0.2.2      lab-cp2   <none>           <none>
kube-scheduler-lab-cp3            1/1     Running   0          31m   192.0.2.3      lab-cp3   <none>           <none>

# kubectl get nodes
$ ssh ansible-hlv3@lab-cp3 -i playbooks/files/ssh/id_ed25519_ansible kubectl get nodes -o wide
NAME                                 STATUS     ROLES           AGE   VERSION   INTERNAL-IP    EXTERNAL-IP   OS-IMAGE                              KERNEL-VERSION                 CONTAINER-RUNTIME
lab-cp1                              NotReady   control-plane   38m   v1.32.2   192.0.2.1   <none>        Debian GNU/Linux 12 (bookworm)        6.1.0-31-amd64                 containerd://2.0.2
lab-cp2                              NotReady   control-plane   37m   v1.32.2   192.0.2.2   <none>        Rocky Linux 9.5 (Blue Onyx)           5.14.0-503.26.1.el9_5.x86_64   containerd://2.0.2
lab-cp3                              NotReady   control-plane   37m   v1.32.2   192.0.2.3   <none>        Ubuntu 24.04.2 LTS                    6.8.0-54-generic               containerd://2.0.2
lab-worker1                          NotReady   <none>          37m   v1.32.2   192.0.2.4   <none>        Red Hat Enterprise Linux 9.5 (Plow)   5.14.0-503.26.1.el9_5.x86_64   containerd://2.0.2
When Things Don't Go Right
One thing I repeatedly forgot to do in my verification runs on writing this post and preparing the repository was that I left the VIP variable unchanged which is 192.0.2.8, and kubernetes cluster init phase keeps waiting for the kube-apiserver access and times out and the init process fails.
Check the variable and make sure it's the VIP you want to use in your homelab subnet.
Other than that, some failures in running ansible playbook might be obvious from just watching the tasks being executed and logs shown.
Some failures may happen during kubeadm init, and the stdout and stderr logs are always saved locally so go check them out.
# if things go wrong during the "kubeadm init" task,
# see the stdout and stderr logs available here
cat playbooks/files/kubernetes/kubeadm.log
cat playbooks/files/kubernetes/kubeadm.err
Also there is a reset tag available to run kubeadm reset and clean up directories to start over. This will not undo etcd cluster setup nor preparatory configuration changes and package installations.
Install network-addon - Cilium
As seen in the post-init checks, all the nodes are listed as the kubernetes cluster member and different pods are up and running. However, as also shown in the same output, the nodes are all in "NotReady" state and coredns pods are stuck in pending state.
The next thing I need to install is a network add-on named Cilium.
A kubernetes cluster becomes functional once its networking component is installed. There are variety of network add-ons available out there such as flannel, calico, Cisco ACI, VMware NSX-T, and the list goes on and on.
I did not go into the details, but in the kubernetes cluster setup tasks, the cluster configuration was adjusted to meet the requirements to use features I wanted to try using Cilium such as the followings:
https://docs.cilium.io/en/stable/installation/k8s-install-external-etcd/#requirements
https://docs.cilium.io/en/stable/network/l2-announcements/#prerequisites
https://docs.cilium.io/en/stable/network/servicemesh/gateway-api/gateway-api/#prerequisites
And so the cilium installation must be customized as well to use these features. I chose to do this using helm as I can make the customization on the "values" file, and document and track the changes on a VCS.
Cilium Installation Using Helm
You need to work on a host that you use to operate the kubernetes cluster. That host may be the same ansible master host or one of the control plane node. In either case, what you need on the operating machine is the access to the cluster. Let's just go with the control plane this time.
Here is the list of tasks:
- install helm
- identify the cilium version to use
- download the values file of the cilium chart on the version you are going to install
- edit the values file
- install the helm chart
Here is the list of commands executed:
# on one of the control plane node
# for example...
# ssh ansible-hlv3@lab-cp1 -i playbooks/files/ssh/id_ed25519_ansible

# install helm
curl https://raw.githubusercontent.com/helm/helm/main/scripts/get-helm-3 | bash

# add cilium repository on helm
helm repo add cilium https://helm.cilium.io/

# confirm the latest version of cilium
helm search repo cilium
helm search repo cilium -l # to see all available versions

# download the values file for version 1.17.1
helm show values cilium/cilium --version 1.17.1 > values.yaml

# edit the values file

# OR, you can use one prepared in the repository
# scp -i playbooks/files/ssh/id_ed25519_ansible playbooks/files/cilium/values.yaml ansible-hlv3@lab-cp1:/home/ansible-hlv3/.

# STILL, MAKE SURE TO EDIT THE ETCD ENDPOINTS
# as they point to the doc ipaddr 192.0.2.x

# nl values.yaml | grep -C4 "endpoints:$"

# create secret for cilium containing etcd cert files
sudo cp /etc/kubernetes/pki/etcd/ca.crt .
sudo cp /etc/kubernetes/pki/apiserver-etcd-client.crt client.crt
sudo cp /etc/kubernetes/pki/apiserver-etcd-client.key client.key

sudo chown $USER:$USER *.crt
sudo chown $USER:$USER *.key

kubectl create secret generic -n kube-system cilium-etcd-secrets \
    --from-file=etcd-client-ca.crt=ca.crt \
    --from-file=etcd-client.key=client.key \
    --from-file=etcd-client.crt=client.crt

sudo rm *.crt *.key

# install
helm install cilium cilium/cilium --version 1.17.1 --values values.yaml -n kube-system
List of Changes Made on Cilium 1.17.1 Values File
Here is the list of changes made to the cilium values file for version 1.17.1, and the entire file is stored at ./playbooks/files/cilium/values.yaml:
- k8sServiceHost: lab-kube-endpoint.lab.example.net
- k8sServicePort: "8443"
- k8sClientRateLimit.qps: 33
- k8sClientRateLimit.burst: 50
- kubeProxyReplacement: "true"
- kubeProxyReplacementHealthzBindAddr: "0.0.0.0:10256"
- l2announcements.enabled: true
- l2announcements.leaseDuration: 3s
- l2announcements.leaseRenewDeadline: 1s
- l2announcements.leaseRetryPeriod: 200ms
- externalIPs.enabled: true
- gatewayAPI.enabled: true
- etcd.enabled: true
- etcd.ssl: true
- etcd.endpoints: ["https://192.0.2.5:2379", "https://192.0.2.6:2379", "https://192.0.2.7:2379"]
- hubble.ui.enabled: true
- hubble.relay.enabled: true
- hubble.peerService.clusterDomain: lab.example.net
Status Check After Cilium Installation
# Nodes are in Ready state
$ ssh ansible-hlv3@lab-cp2 -i playbooks/files/ssh/id_ed25519_ansible kubectl get nodes
NAME                                 STATUS   ROLES           AGE   VERSION
lab-cp1                              Ready    control-plane   69m   v1.32.2
lab-cp2                              Ready    control-plane   69m   v1.32.2
lab-cp3                              Ready    control-plane   69m   v1.32.2
lab-worker1                          Ready    <none>          69m   v1.32.2


# CoreDNS and all the other pods are ready and runnning
$ ssh ansible-hlv3@lab-cp3 -i playbooks/files/ssh/id_ed25519_ansible kubectl get all -n kube-system
NAME                                  READY   STATUS    RESTARTS   AGE
pod/cilium-6npvn                      1/1     Running   0          5m54s
pod/cilium-dzflv                      1/1     Running   0          5m54s
pod/cilium-envoy-c6wnr                1/1     Running   0          5m54s
pod/cilium-envoy-mh4h4                1/1     Running   0          5m54s
pod/cilium-envoy-nprtn                1/1     Running   0          5m54s
pod/cilium-envoy-zrzl5                1/1     Running   0          5m54s
pod/cilium-l5dq9                      1/1     Running   0          5m54s
pod/cilium-m5pbg                      1/1     Running   0          5m54s
pod/cilium-operator-5f59576-qnxzv     1/1     Running   0          5m54s
pod/cilium-operator-5f59576-txw7h     1/1     Running   0          5m54s
pod/coredns-668d6bf9bc-bbldg          1/1     Running   0          67m
pod/coredns-668d6bf9bc-qtcrw          1/1     Running   0          67m
pod/haproxy-lab-cp1                   1/1     Running   0          67m
pod/haproxy-lab-cp2                   1/1     Running   0          67m
pod/haproxy-lab-cp3                   1/1     Running   0          67m
pod/hubble-relay-7bf4fc498b-rnfkq     1/1     Running   0          5m54s
pod/hubble-ui-69d69b64cf-hv7mk        2/2     Running   0          5m54s
pod/keepalived-lab-cp1                1/1     Running   0          67m
pod/keepalived-lab-cp2                1/1     Running   0          67m
pod/keepalived-lab-cp3                1/1     Running   0          67m
pod/kube-apiserver-lab-cp1            1/1     Running   0          67m
pod/kube-apiserver-lab-cp2            1/1     Running   0          67m
pod/kube-apiserver-lab-cp3            1/1     Running   0          67m
pod/kube-controller-manager-lab-cp1   1/1     Running   0          67m
pod/kube-controller-manager-lab-cp2   1/1     Running   0          67m
pod/kube-controller-manager-lab-cp3   1/1     Running   0          67m
pod/kube-scheduler-lab-cp1            1/1     Running   0          67m
pod/kube-scheduler-lab-cp2            1/1     Running   0          67m
pod/kube-scheduler-lab-cp3            1/1     Running   0          67m

NAME                   TYPE        CLUSTER-IP      EXTERNAL-IP   PORT(S)                  AGE
service/cilium-envoy   ClusterIP   None            <none>        9964/TCP                 5m54s
service/hubble-peer    ClusterIP   10.96.232.5     <none>        443/TCP                  5m54s
service/hubble-relay   ClusterIP   10.96.122.84    <none>        80/TCP                   5m54s
service/hubble-ui      ClusterIP   10.96.208.145   <none>        80/TCP                   5m54s
service/kube-dns       ClusterIP   10.96.0.10      <none>        53/UDP,53/TCP,9153/TCP   67m

NAME                          DESIRED   CURRENT   READY   UP-TO-DATE   AVAILABLE   NODE SELECTOR            AGE
daemonset.apps/cilium         4         4         4       4            4           kubernetes.io/os=linux   5m54s
daemonset.apps/cilium-envoy   4         4         4       4            4           kubernetes.io/os=linux   5m54s

NAME                              READY   UP-TO-DATE   AVAILABLE   AGE
deployment.apps/cilium-operator   2/2     2            2           5m54s
deployment.apps/coredns           2/2     2            2           67m
deployment.apps/hubble-relay      1/1     1            1           5m54s
deployment.apps/hubble-ui         1/1     1            1           5m54s

NAME                                      DESIRED   CURRENT   READY   AGE
replicaset.apps/cilium-operator-5f59576   2         2         2       5m54s
replicaset.apps/coredns-668d6bf9bc        2         2         2       67m
replicaset.apps/hubble-relay-7bf4fc498b   1         1         1       5m54s
replicaset.apps/hubble-ui-69d69b64cf      1         1         1       5m54s
Done
Alright! The etcd cluster is up, kubernetes cluster is also up its network add-on functional, and I am so happy.
So this is it for building a highly-available kubernetes cluster adopting external etcd cluster topology. A couple etcd nodes may crash at one point, and the kubernetes cluster remain functional and repsonsive. A couple control plane nodes may go down, and the cluster would again remain functional and responsive.
The configuration provided in the repository by default set lab-cp1 keepalived service to be the master and be responsible for the VIP. You can shutdown lab-cp1 and observe that the other control plane node takes over the VIP, its haproxy loadbalancer receives the traffic to kube-endpoint, passes onto a live kube-apiserver on lab-cp2 or lab-cp3.
Demo
Lastly, let me do a quick demo using Cilium L2Announcement.
Scheduling Workloads on Control Planes
By default an ordinary workload won't get scheduled to run on control plane nodes.
Since I have so limited resources on homelab compared to an enterprise infrastructure, I always change this setting and utilize control plane nodes as much as worker nodes.
# on lab-cp1
kubectl taint nodes lab-cp1 node-role.kubernetes.io/control-plane:NoSchedule-
kubectl taint nodes lab-cp2 node-role.kubernetes.io/control-plane:NoSchedule-
kubectl taint nodes lab-cp3 node-role.kubernetes.io/control-plane:NoSchedule-
Update CoreDNS Configuration
The name lookup behavior might change depending on which node a workload gets scheduled and how the node is configured in terms of nameservers. I like to make this change on CoreDNS, the main DNS service in the kubernetes cluster so the behavior is all the same as long as CoreDNS is concerned.
# retrieve the configmap
kubectl get configmap coredns -n kube-system -o yaml > cm-coredns.yaml

# edit the configmap and then apply it
kubectl replace -f cm-coredns.yaml

# restart coredns deployment to recreate coredns pods with the updated configmap
kubectl -n kube-system rollout restart deployment coredns
The part I wanted to change is the 5 lines in the forwarder section to use Cloudflare DNS services just like the ones setup on docker.
On my actual homelab, I am pointing the "." forwarder to my main DNS servers running outside the kubernetes cluster. You can change however you like depending on what you have on your environment.
data:
  Corefile: |
    .:53 {
        errors
        health {
           lameduck 5s
        }
        ready
        kubernetes lab.example.net in-addr.arpa ip6.arpa {
           pods insecure
           fallthrough in-addr.arpa ip6.arpa
           ttl 30
        }
        prometheus :9153
        forward . tls://1.1.1.1 tls://1.0.0.1 {
           tls_servername cloudflare-dns.com
           health_check 5s
           max_concurrent 1000
        }
        cache 30 {
           disable success lab.example.net
           disable denial lab.example.net
        }
        loop
        reload
        loadbalance
    }
Cilium L2Announcement
The services running on the cluster is accessible on nodes participating the cluster.
# on lab-cp1
$ kubectl get svc -n kube-system
NAME           TYPE        CLUSTER-IP      EXTERNAL-IP   PORT(S)                  AGE
cilium-envoy   ClusterIP   None            <none>        9964/TCP                 24m
hubble-peer    ClusterIP   10.96.232.5     <none>        443/TCP                  24m
hubble-relay   ClusterIP   10.96.122.84    <none>        80/TCP                   24m
hubble-ui      ClusterIP   10.96.208.145   <none>        80/TCP                   24m
kube-dns       ClusterIP   10.96.0.10      <none>        53/UDP,53/TCP,9153/TCP   86m

# works on kubernetes cluster nodes, but the network is inaccessible from other hosts on the homelab subnet
$ host kubernetes.default.svc.lab.example.net. 10.96.0.10
Using domain server:
Name: 10.96.0.10
Address: 10.96.0.10#53
Aliases:

kubernetes.default.svc.lab.example.net has address 10.96.0.1
However, all these 10.96.*.* IP addresses shown as the service IP address are not accessible from outside the kubernetes cluster. One of the solutions to this is by using layer 2 advertisement feature.
In this demo, I am going to use the hubble-ui service that I enabled in the cilium helm chart to demonstrate this. The goal is to have this hubble-ui accessible on my homelab subnet.
Firstly, I look for the appropriate label to use to identify the hubble-ui pods.
# looking at the defined labels on the hubble-ui deployment
$ kubectl get deploy hubble-ui -n kube-system -o jsonpath='{.spec.template.metadata.labels}'
{"app.kubernetes.io/name":"hubble-ui","app.kubernetes.io/part-of":"cilium","k8s-app":"hubble-ui"}o

# double check that the label works
$ kubectl get pods -l 'k8s-app=hubble-ui' -n kube-system
NAME                        READY   STATUS    RESTARTS   AGE
hubble-ui-68bb47466-6gkwb   2/2     Running   0          100m
I then create another service for the hubble-ui, but in loadbalancer type.
# create this service "l2-hubble-ui" on kube-system namespace
cat <<EOF | kubectl apply -f -
apiVersion: v1
kind: Service
metadata:
  name: l2-hubble-ui
  namespace: kube-system
  labels:
    app.kubernetes.io/name: l2-hubble-ui
spec:
  type: LoadBalancer
  ports:
    - port: 80
      protocol: TCP
      targetPort: 8081
  selector:
    k8s-app: hubble-ui
EOF
The new service is created to access the same hubble-ui pods as the existing "hubble-ui" service.
# the created service with "pending" external IP address allocation
$ kubectl get svc l2-hubble-ui -n kube-system
NAME           TYPE           CLUSTER-IP     EXTERNAL-IP   PORT(S)        AGE
l2-hubble-ui   LoadBalancer   10.96.81.203   <pending>     80:32334/TCP   36s
Now I create a cilium IP pool for the created "l2-hubble-ui" service.
# CHANGE the IP address from 192.0.2.24 to whichever IP address you want to assign for hubble-ui
# the IP address you set in the DNS server configuration file should be the one
cat <<EOF | kubectl apply -f -
apiVersion: "cilium.io/v2alpha1"
kind: CiliumLoadBalancerIPPool
metadata:
  name: "ippool-hubble-ui"
spec:
  blocks:
    - start: "192.0.2.24"
      stop: "192.0.2.24"
  serviceSelector:
    matchExpressions:
      - { key: app.kubernetes.io/name, operator: In, values: [l2-hubble-ui] }
EOF
Now the external IP address gets assigned to the service.
$ kubectl get svc l2-hubble-ui -n kube-system
NAME           TYPE           CLUSTER-IP     EXTERNAL-IP    PORT(S)        AGE
l2-hubble-ui   LoadBalancer   10.96.81.203   192.0.2.24     80:32334/TCP   4m
YES! Now, is it reachable? Not yet, as no one is advertising on the LAN that this IP address is in use and available. So next, the l2 announcement policy needs to be created.
cat <<EOF | kubectl apply -f -
apiVersion: "cilium.io/v2alpha1"
kind: CiliumL2AnnouncementPolicy
metadata:
  name: l2-hubble-ui
spec:
  serviceSelector:
    matchLabels:
      app.kubernetes.io/name: l2-hubble-ui
  interfaces:
    - ^eth[0-9]+
    - ^eno[0-9]+
    - ^enp[0-9]s[0-9]+
  loadBalancerIPs: true
EOF
Now the IP address gets advertised on LAN, and I can connect to the hubble-ui from a web-browser on other machines on my home LAN.
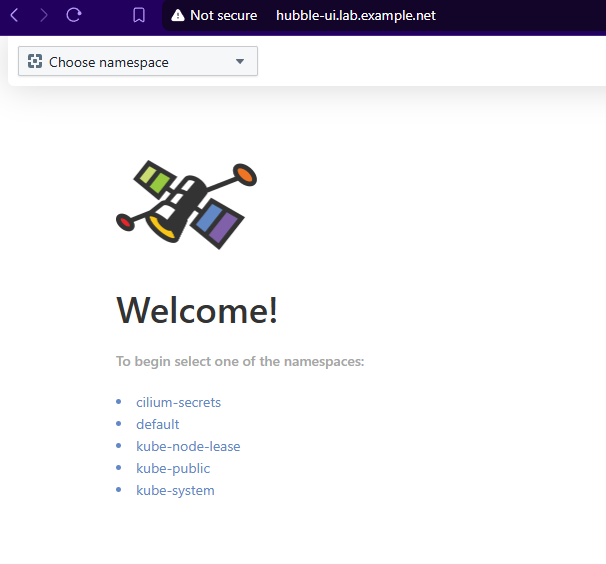
Hubble UI
https://github.com/cilium/hubble-ui
Observability & Troubleshooting for Kubernetes Services
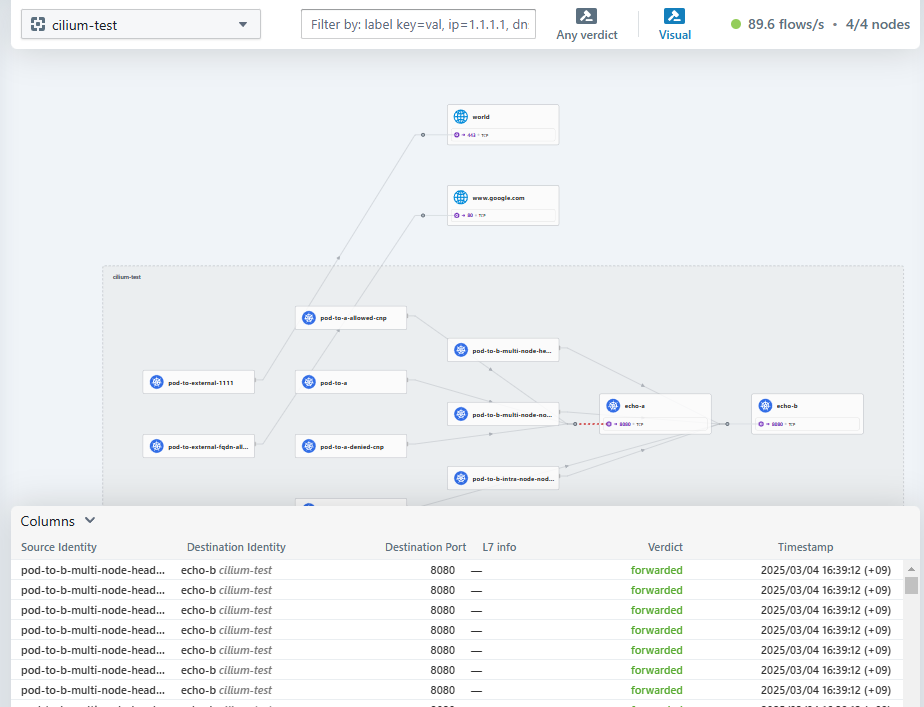
Since this is the tool to see something going on in the cluster, we want something running. There is a cilium post-installation test programs available which is introduced in the installation document. Let's go ahead and use this.
https://docs.cilium.io/en/latest/installation/k8s-install-helm/#validate-the-installation
It is as simple as spinning up the name lookup test pod, to create a namespace, do kubectl apply, and delete the namespace to clean up all.
# on lab-cp1 or any control plane node

# create the namespace cilium-test
kubectl create ns cilium-test

# run the connecitvity check pods in the cilium-test namespace
kubectl apply -n cilium-test -f https://raw.githubusercontent.com/cilium/cilium/1.17.1/examples/kubernetes/connectivity-check/connectivity-check.yaml

# clean up
kubectl delete ns cilium-test
Here is the screen capture of the hubble UI for the cilium-test namespace.